A while ago I described how to create a virtual ISO disk image with macOS to be compatible to Windows & Linux. After researching this again, I am happy to explain a better way using the Disk Utility app in macOS.
On macOS: create a hybrid ISO image using Disk Utility.app
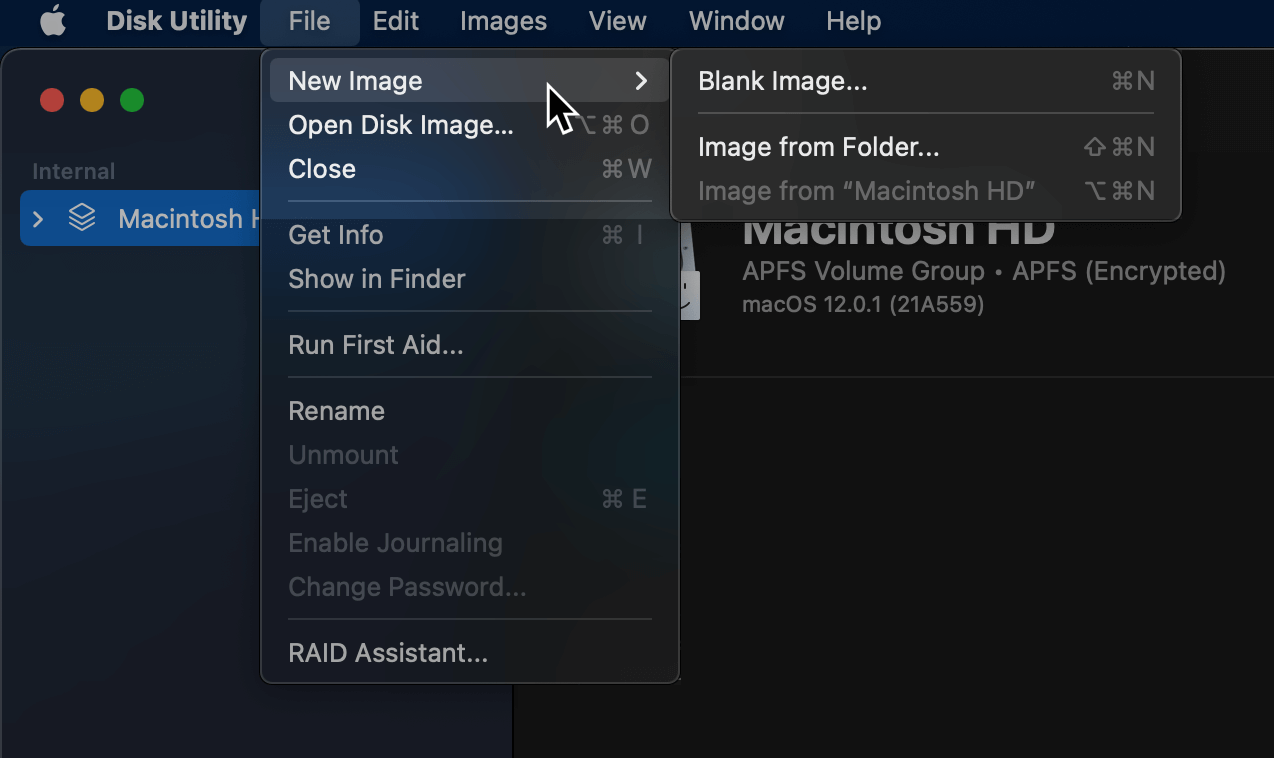
- Open the «Disk Utility» app from the «Utilities»-folder (shortcut
CMD+Uin Finder)
- From the «File»-menu navigate to «New Image»
- Decide from where to create the virtual ISO disk image…
- Blank image…
- a Finder folder…
- or a physical Disk / Volume mounted on your Mac
- Follow the on-screen instructions; as «Image Format» you must select «
hybrid image (HFS+/ISO/UDF)»
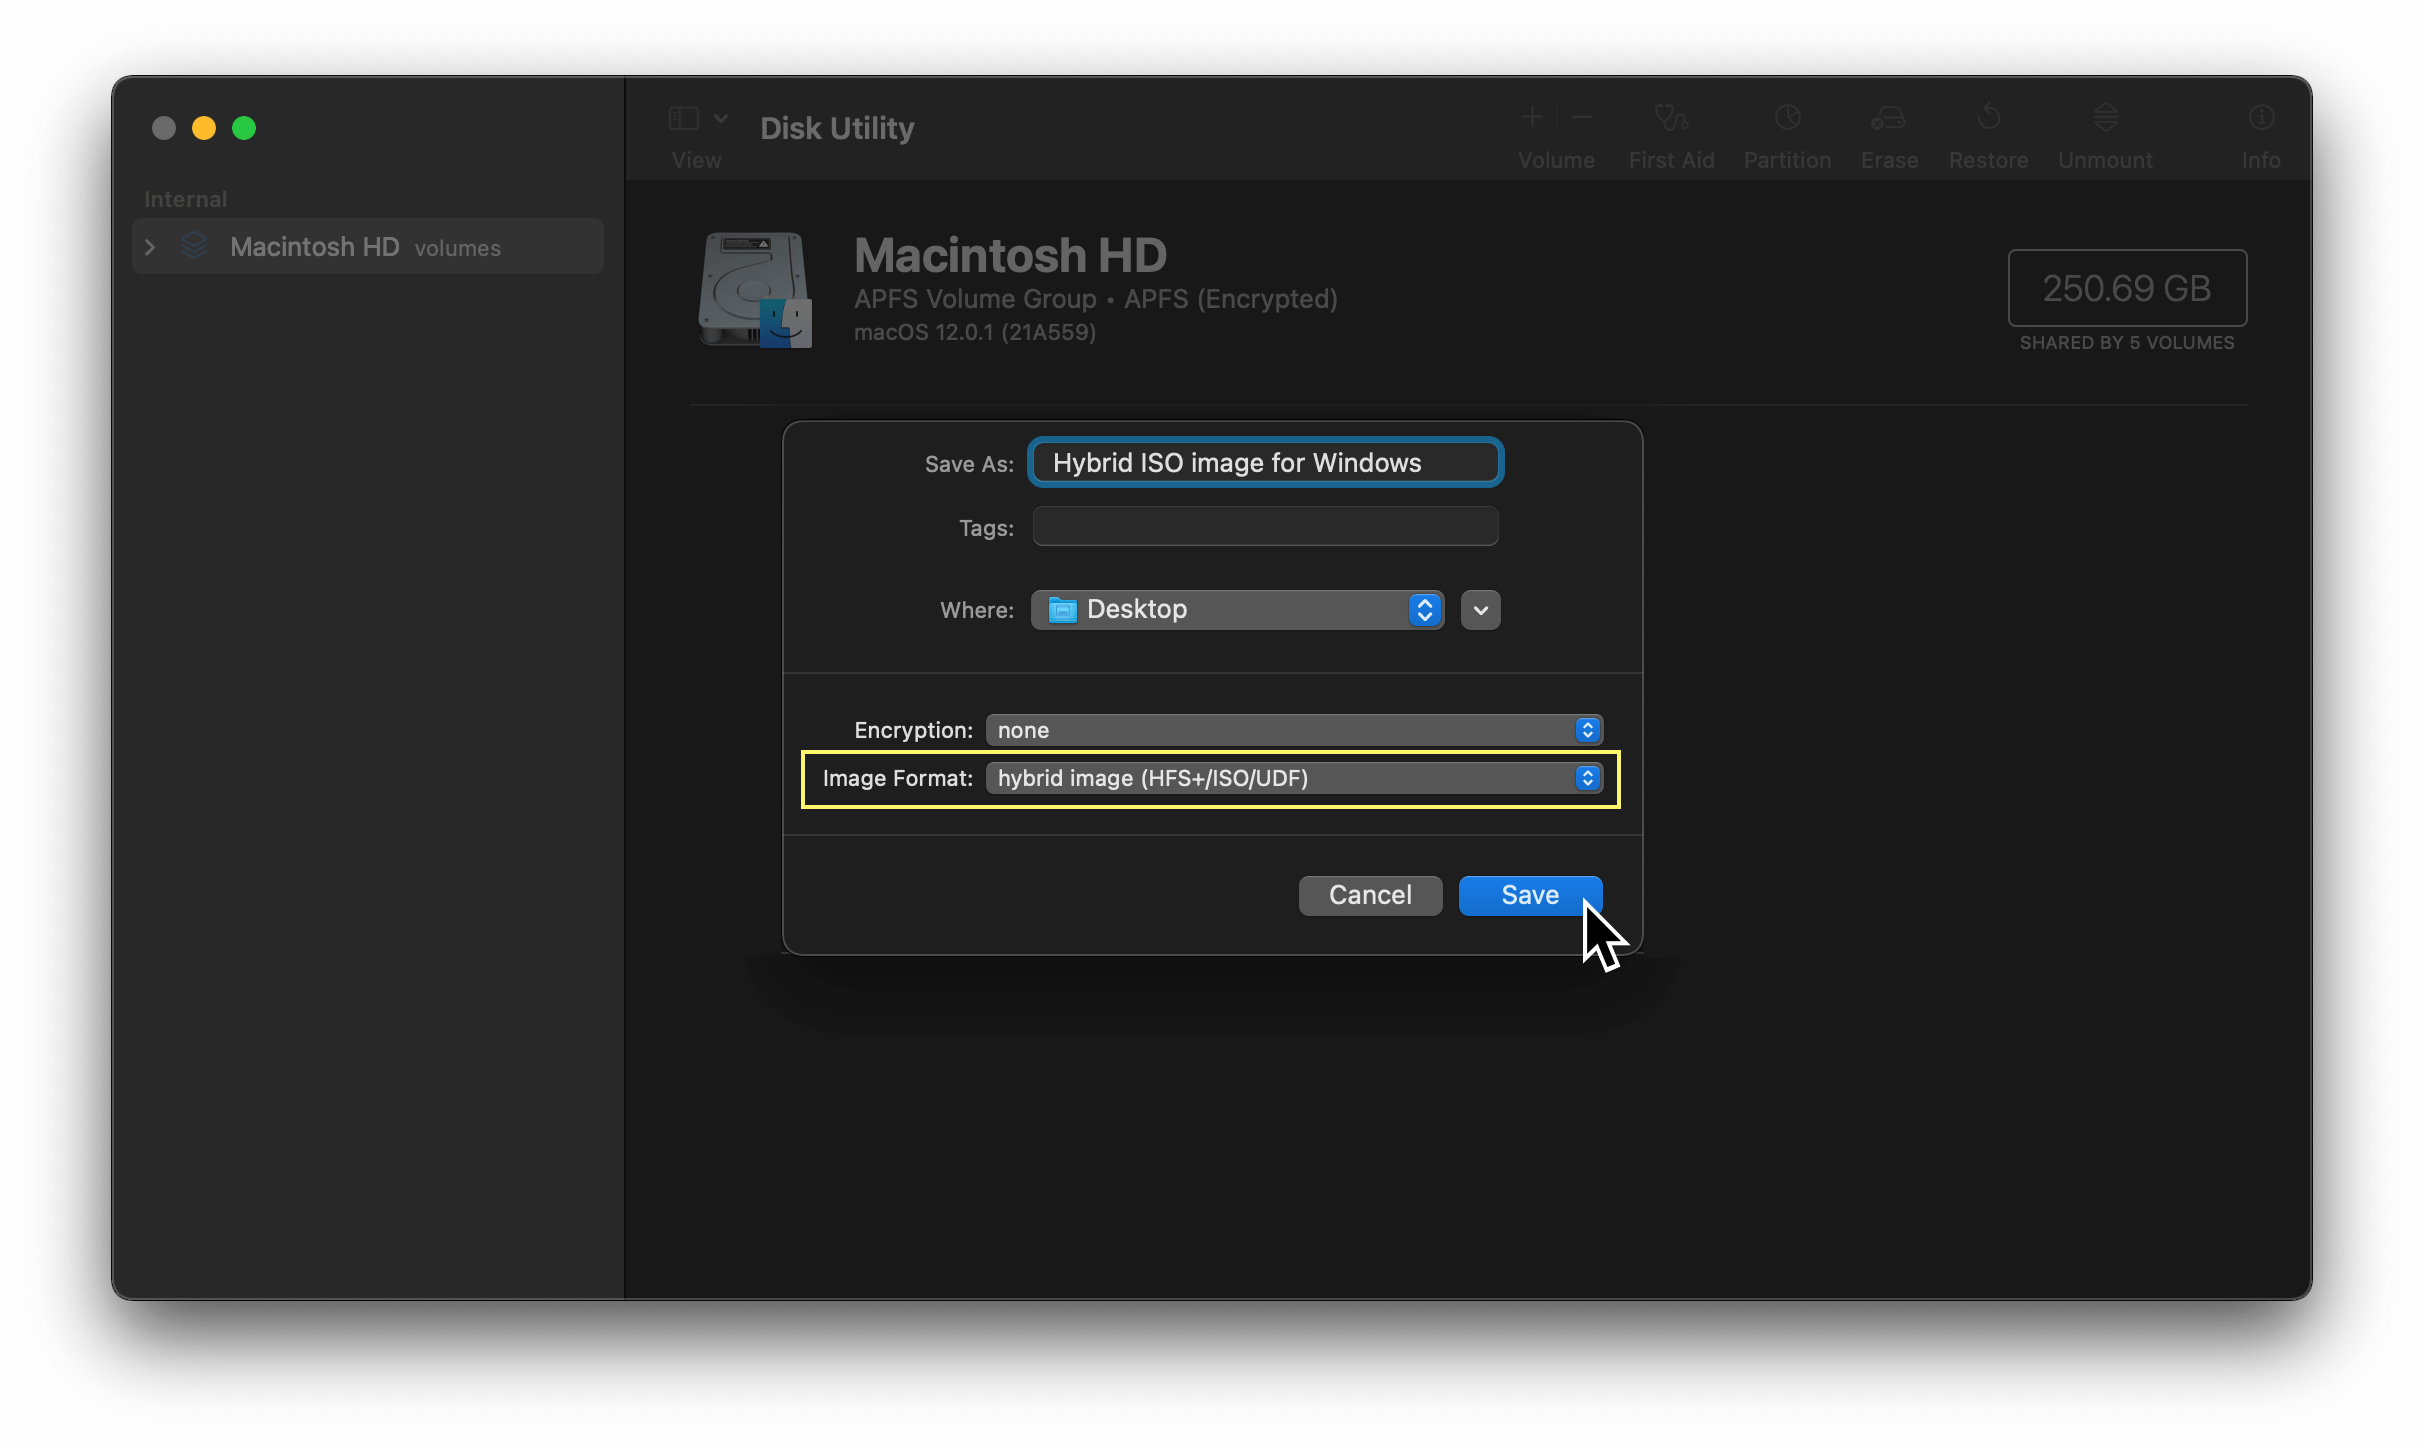
- Click «Save» – and the virtual ISO disk image is created!
Now transfer the file over to Windows…
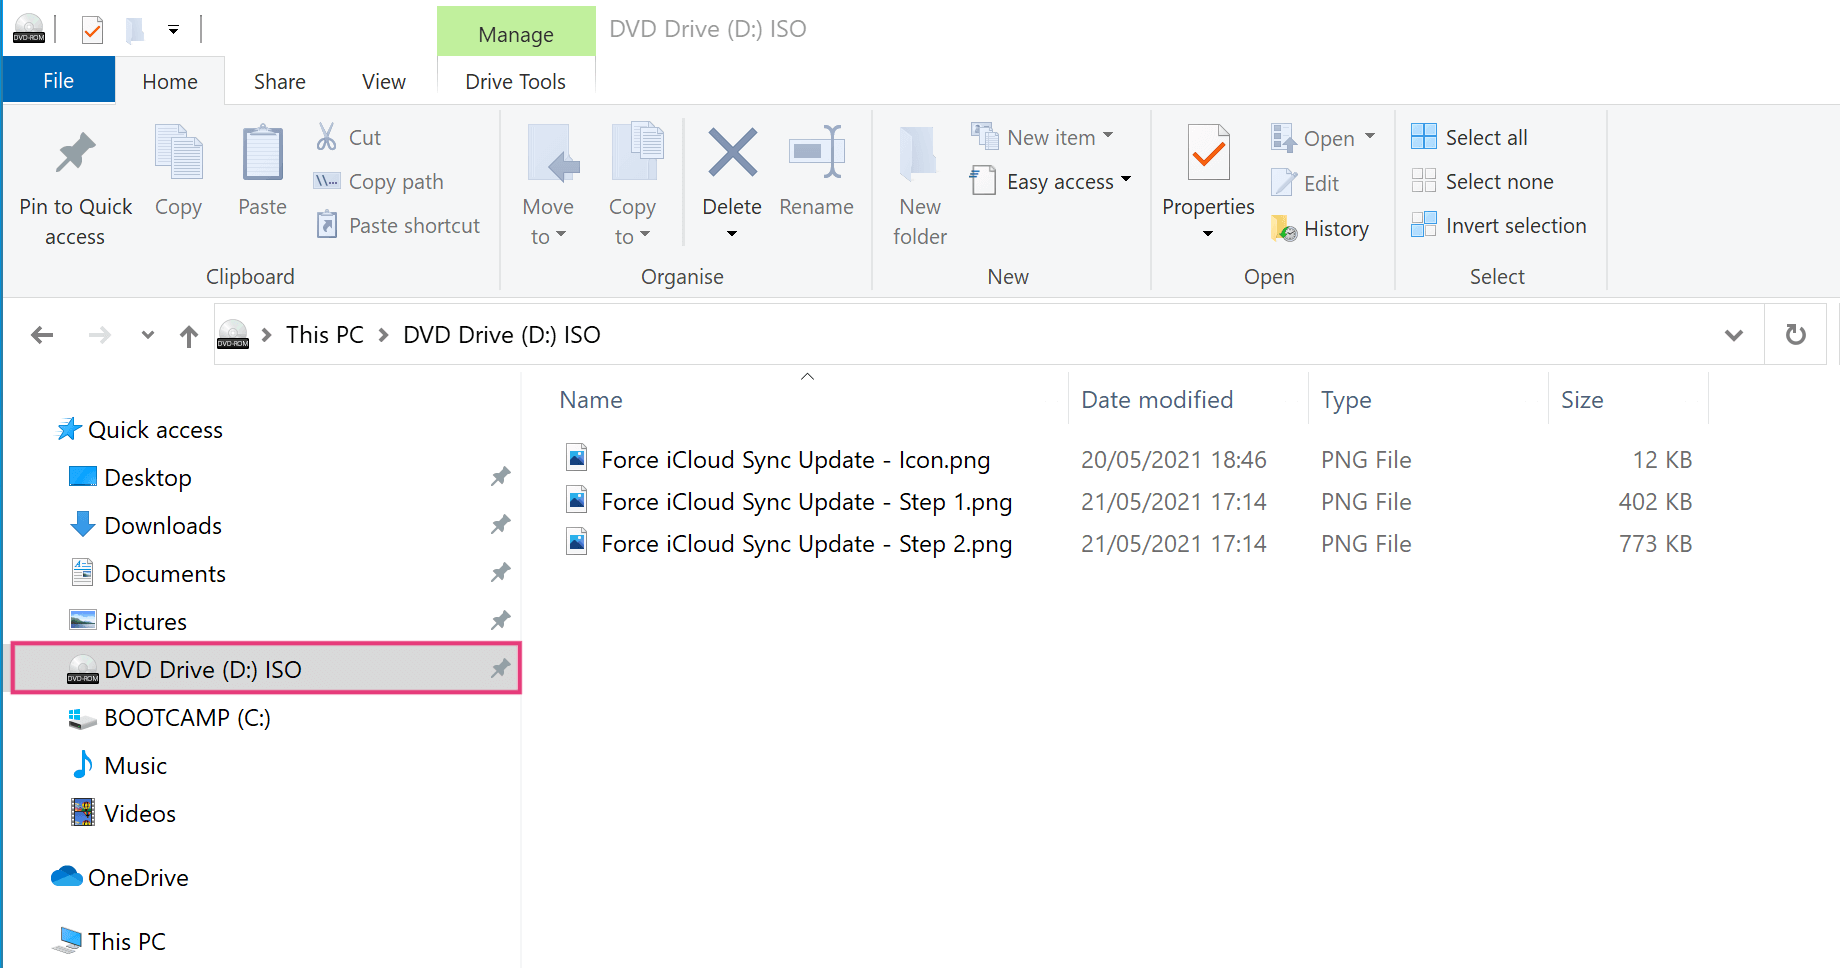
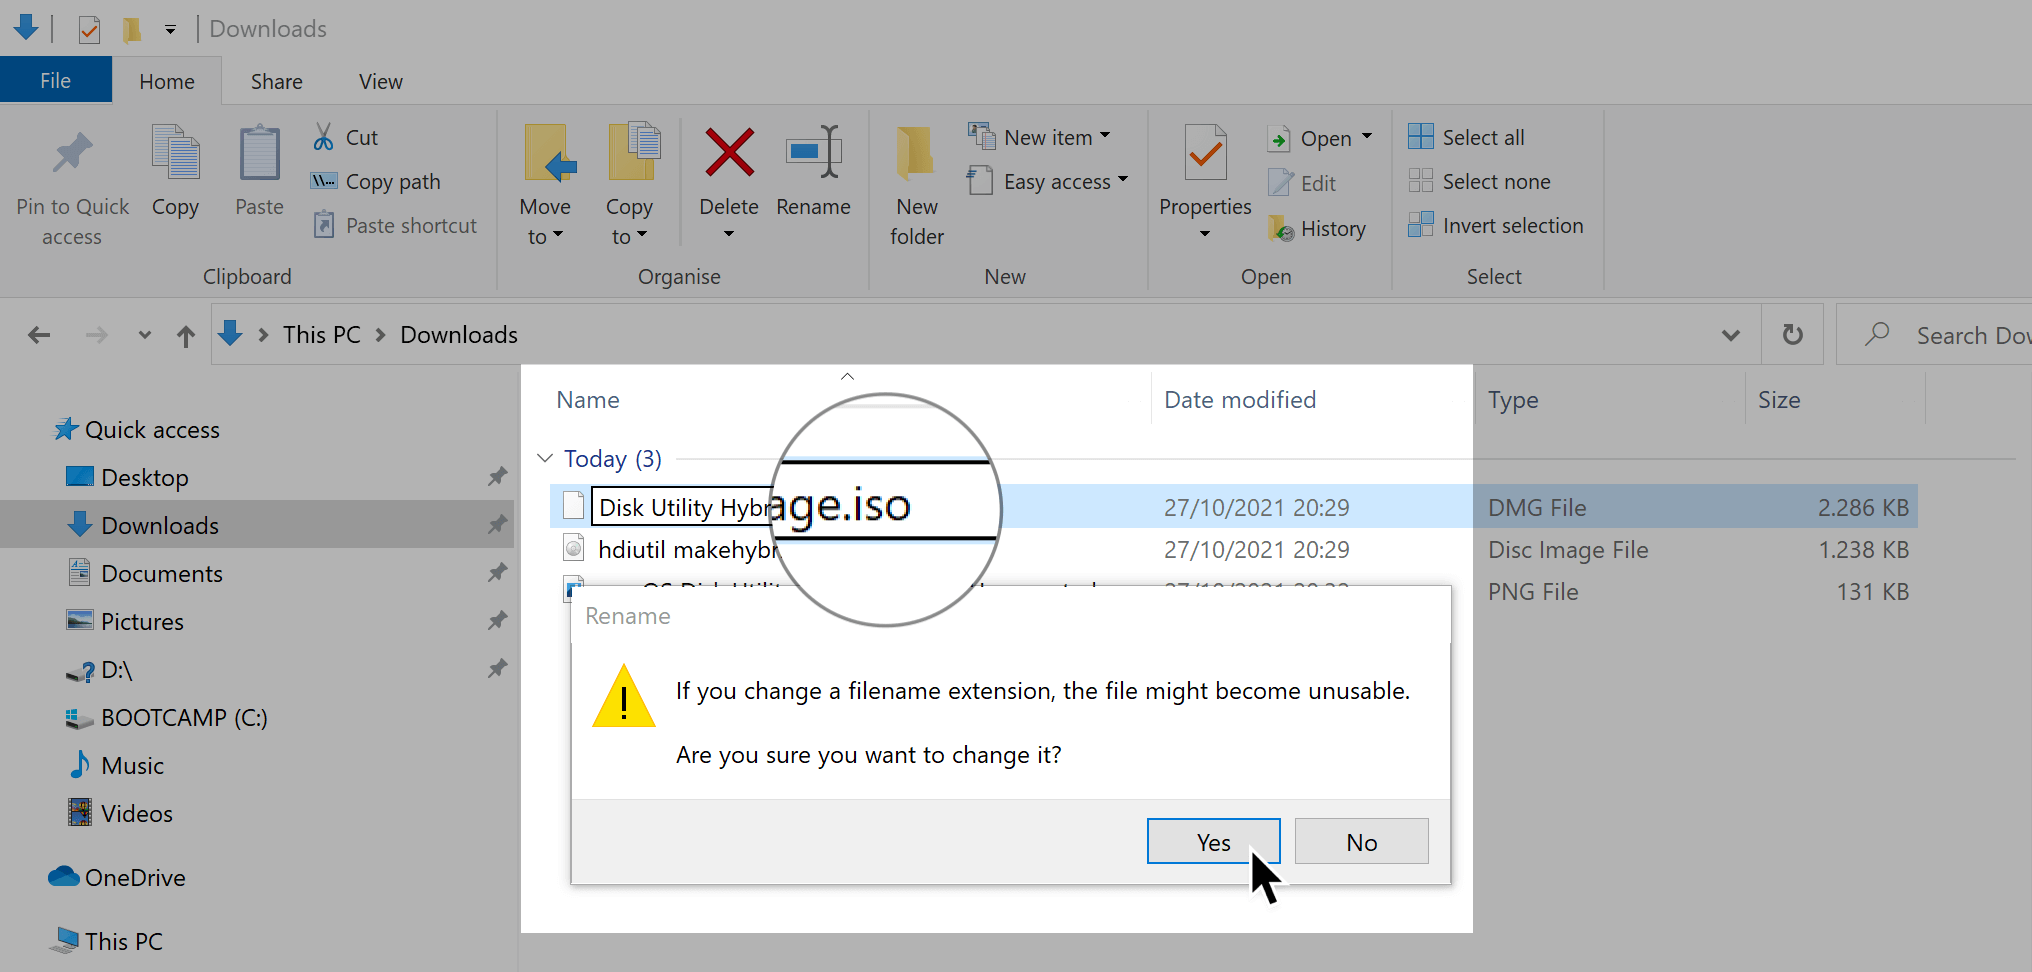
On Windows: change the disk image extension
Once the image file is transferred to Windows, locate it in the Windows File Explorer.
- Select the hybrid image file with the «.dmg»-file extension
- Start changing the file name, and rename it’s extension to «.iso» (instead of .dmg)
If Windows shows a warning, just acknowledge by confirming the message
- Ready to go: right-click the virtual image file & select «Mount»
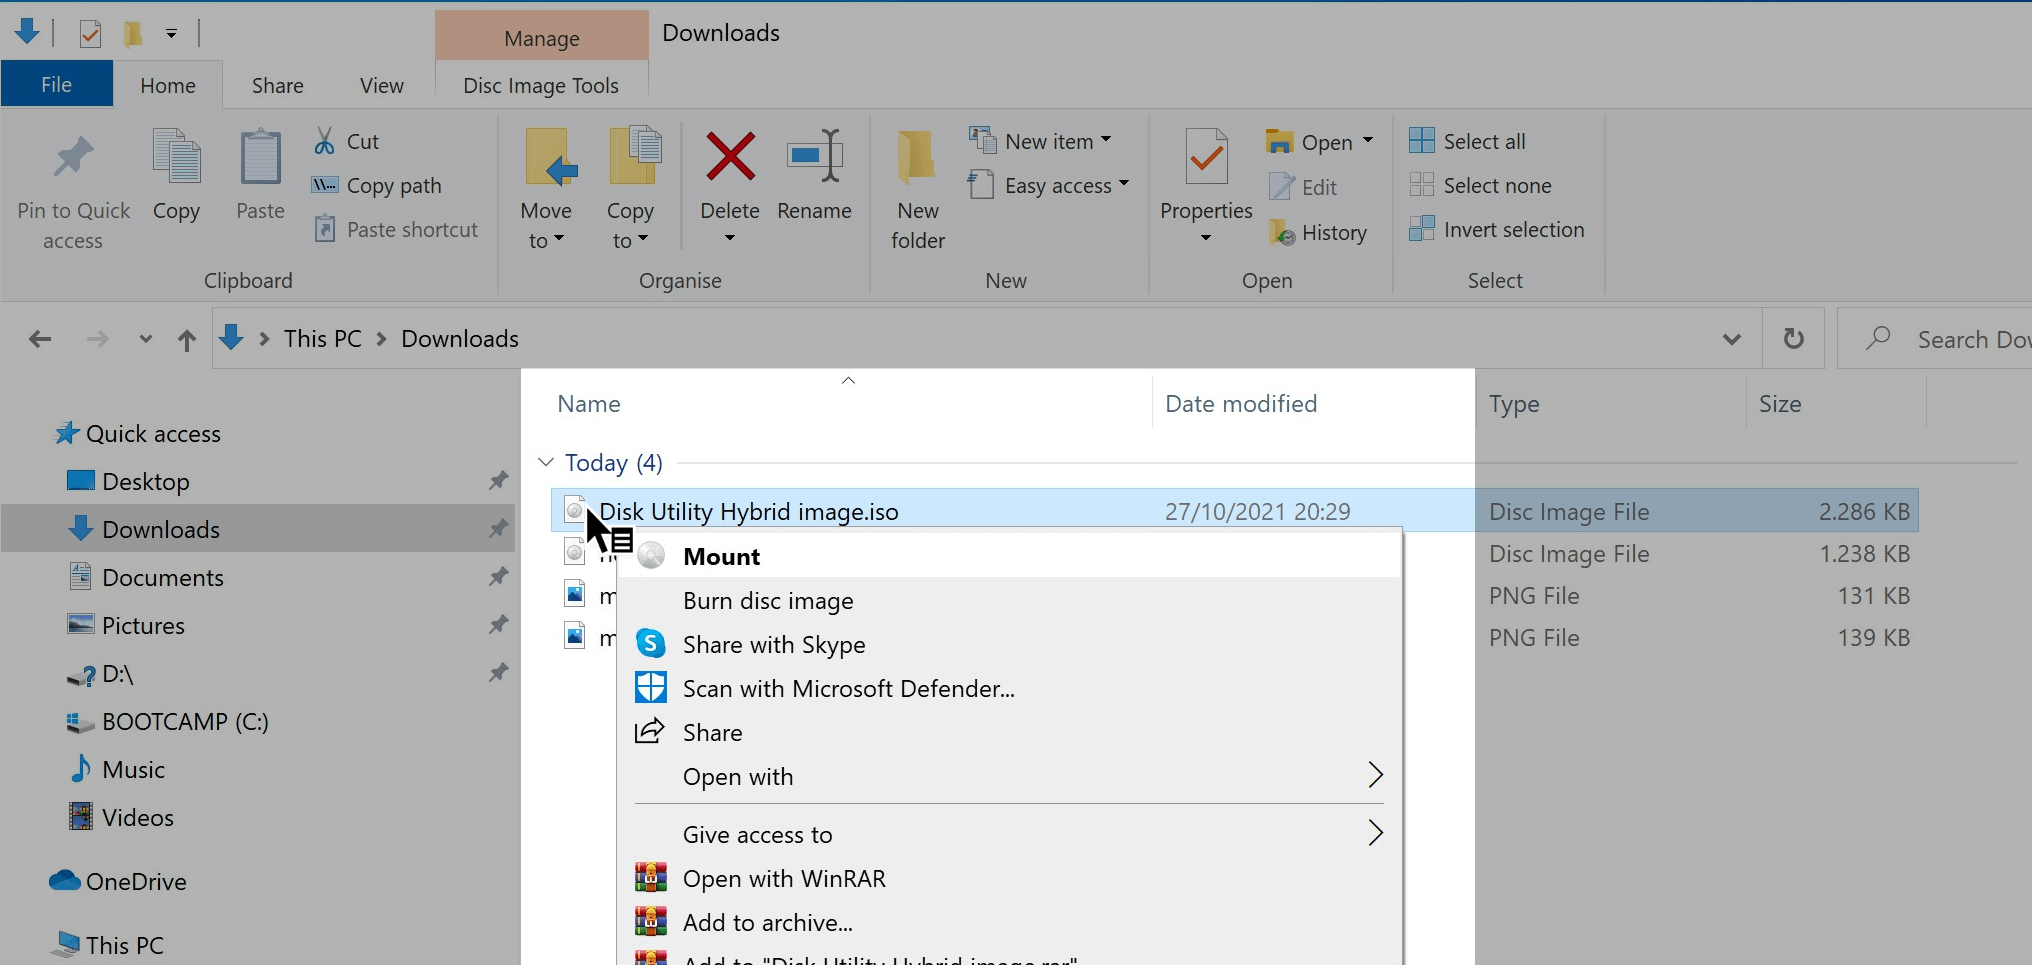
Here you go!
The virtual disk, created on a Mac, should have been properly mounted in Windows!