
Since I last played DOOM 3 many, many changes to the Apple Mac landscape have happened: we got the ARM-based chip architecture «Apple Silicon», and OS X evolved into a native 64-bit macOS operating system. So no wonder, when I checked about DOOM 3 on modern Macs, it was again a little journey…
Here’s the summary of how to natively run DOOM 3 on modern macOS on M1/M2/Mx hardware.
Get ready to play: sorting the game files in macOS Finder
Once you have access to the DOOM 3 game files and mounted the dhewm3 DMG-file from Mac Source Ports, you have to place the files in different places. Consult the screenshot below to see what goes where:
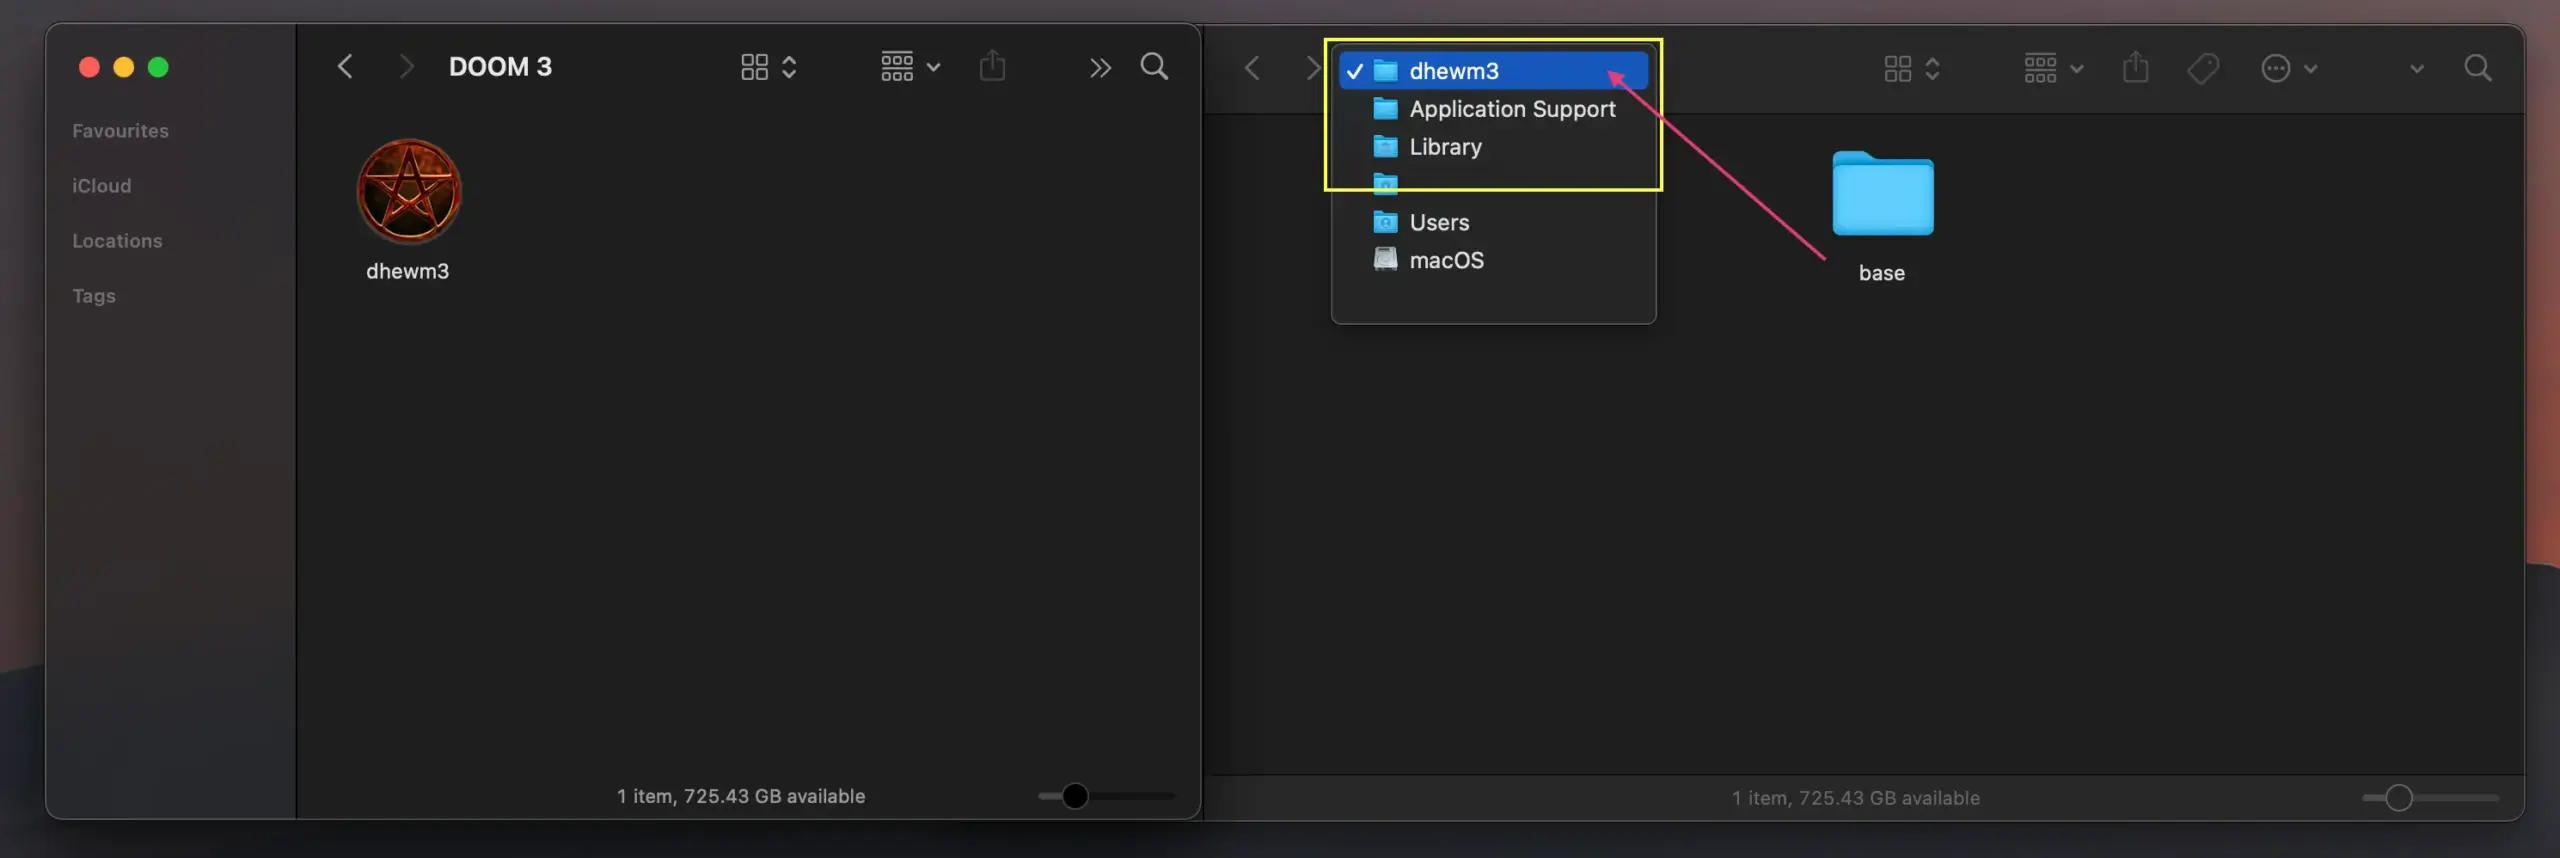
dhewm3.app and the base folder need to be placed.Put «dhewm3.app» in /Applications/ folder
This is pretty simply: either follow the instructions within the mounted volume of dhewm3 – or manually drag’n’drop the «dhewm3.app» to your /Applications/ folder, your user’s ~/Applications/ folder, or a custom ~/Games/DOOM3/ folder.
It doesn’t really matter – just get it out of the mounted volume.
Copy the DOOM 3 «base» folder to /Application Support/
Having the actual game files in the right place is a bit more tricky, as mostly your user’s ~/Library/ folder is not visible. But in the meantime, Apple introduced a keyboard-shortcut in Finder – hooray!
- In Finder, use this keyboard shortcut:
⌘Command+⇧Shift+L
Alternatively click the Go menu » Go to folder… & type~/Library
- Now you should see the «
Library» folder popping up
- From the list of folders, open «
/Application Support»
Alternatively in Finder click Go » Go to folder… & type~/Library/Application Support
- Within that, create a new folder named exactly:
dhewm3
- Open the just added «
/Application Support/dhewm3/» folder
- Now have the original «Doom 3»-game folder ready & copy the whole «
base»-folder into/dhewm3/!
Making it beautiful: widescreen resolution & HD graphics patches
Unfortunately the in-game settings don’t allow to switch DOOM 3 into widescreen and fullscreen resolution reliably. So you have to do this in a configuration file – but it should be straight-forward to get you your desired native resolutions & widescreen support!
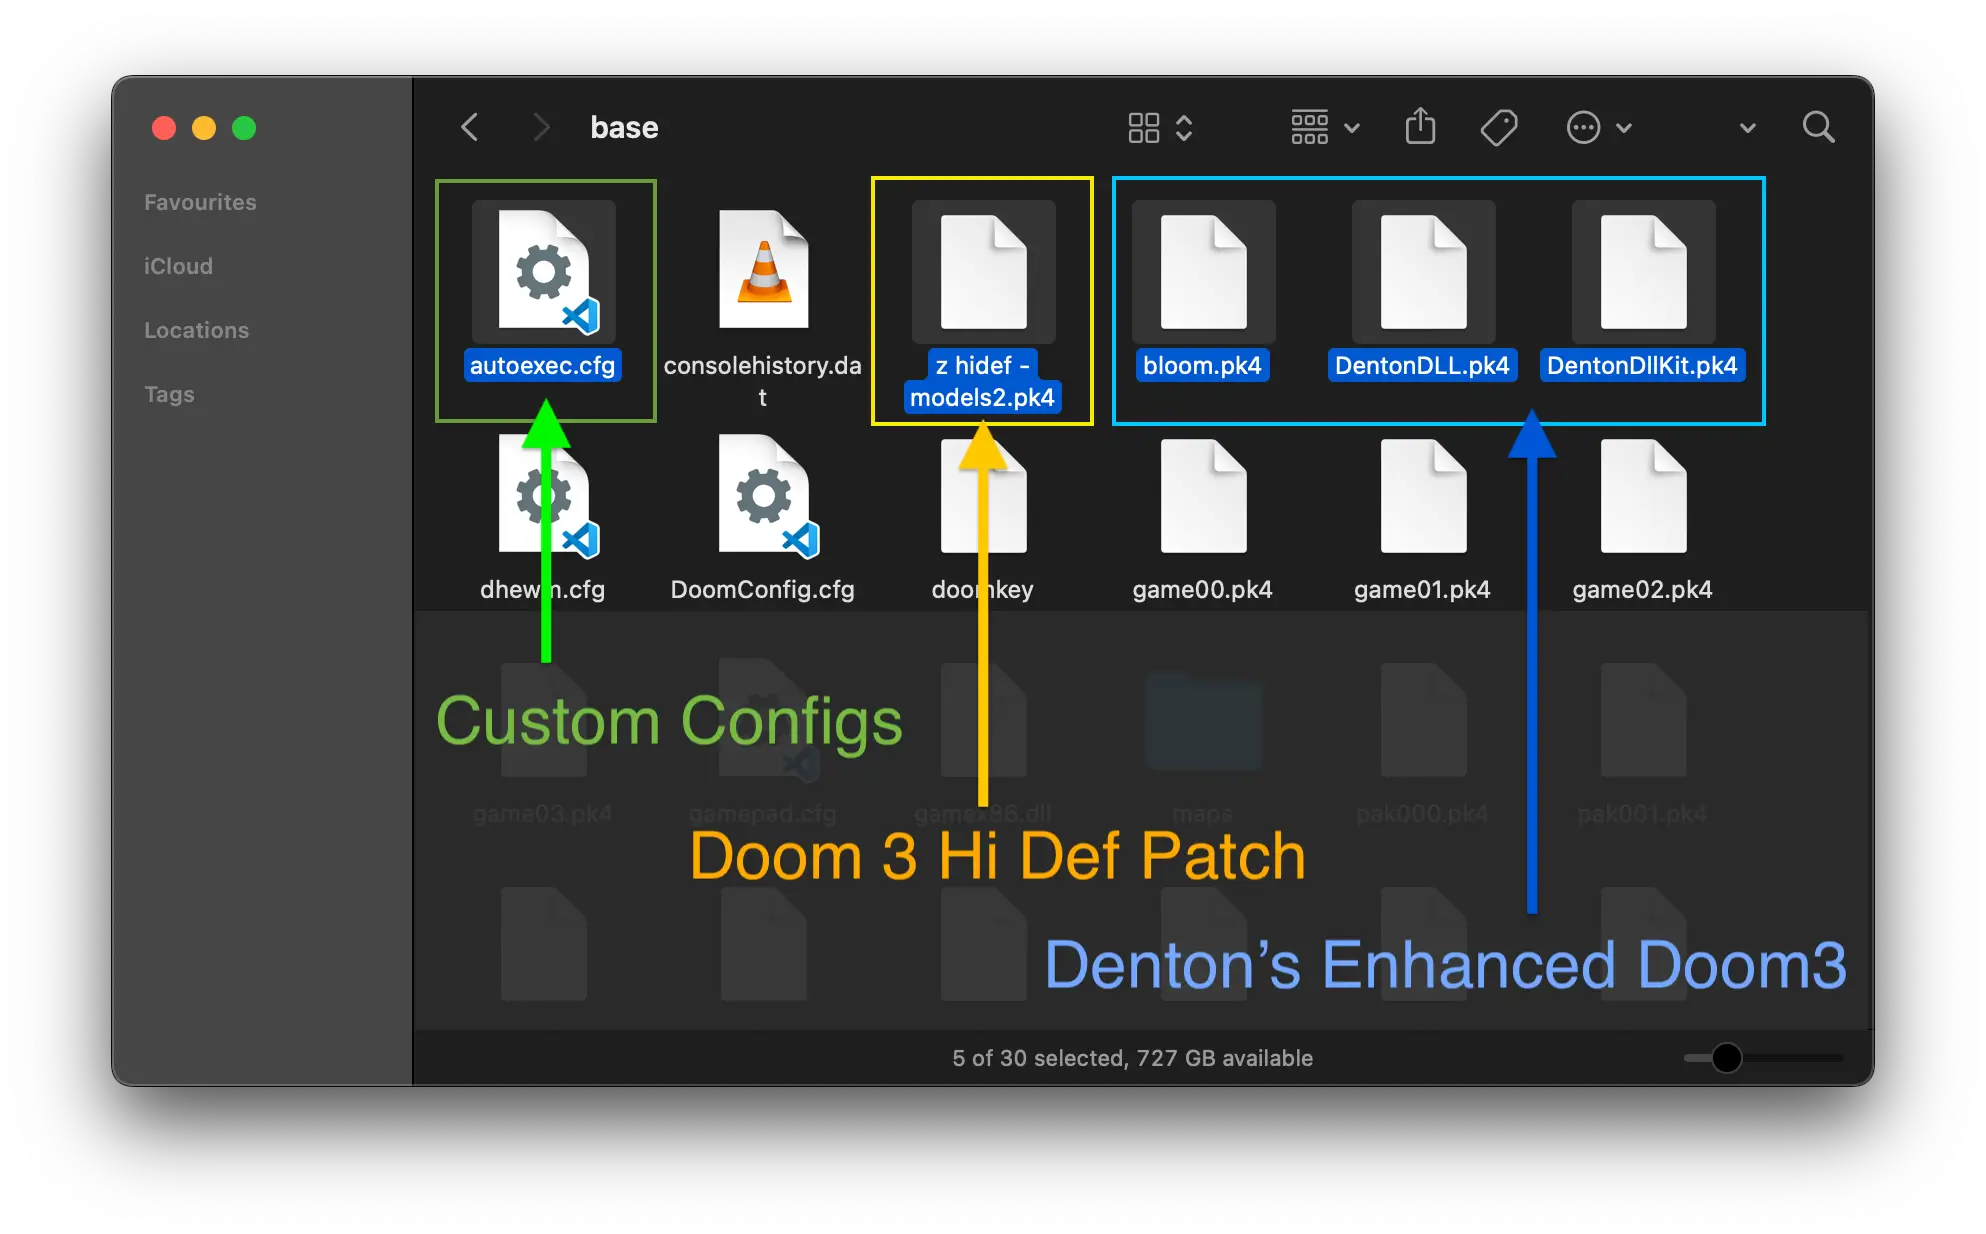
base-folder with custom additionsConfiguring native fullscreen resolution & go beyond 120 FPS in DOOM 3
First of all what you may want is to have DOOM 3 run fullscreen and in your desktop’s native resolution. In order to achieve this, I recommend creating a separate configuration file, where you adapt the values to your Mac’s display settings.
- Create a new text file in «TextEdit.app» – or any other text editor of your choice
- Copy-paste below lines into the new file.
- Don’t forget to update the values to your liking / according to your Mac’s «Display Settings»!
- Save the file as «
autoexec.cfg» into~/Library/Application Support/dhewm3/base/
Example widescreen settings for DOOM 3 «autoexec.cfg»
But there is more: high-definition graphics, textures, and models
There are 2 patches I recommend to apply, in order to increase the quality of models and textures in DOOM 3: the «Doom 3 Hi Def» patch, and «Denton’s Enhanced Doom3» patch:
Once the files have been downloaded & extracted from their ZIP-file:
- See above screenshot for which mod files are required.
- copy the mods’
.pk4-files also to the «base» folder here:~/Library/Application Support/dhewm3/base/
And finally: polishing up the overall graphics & look’n’feel in DOOM 3
There are a ton of tweaks and configs for DOOM 3: I put together a list of which I found useful and applied.
Use whatever settings you like from the following set of additional configurations – just copy-paste the lines into the «autoexec.cfg» file:

What a great idea. I am trying it. How does one find the .pk4 files? I have the game from gog.com, but on downloading I have a .bin or .exe, neither of which I can unpack.
@Billy you can use the «Extractor» Utility from MacSourcePorts.com to extract all Game files from a gog.com-game in macOS.
So the weird thing is I have successfully followed the instal process, got the game from gog.com, but it’s installed the Spanish version!
Weirdly getting the Spanish language version when I download, Spanish voice acting, graphics. I wonder why GOG.com is giving me that one
@Bill & @Will: DOOM 3 from gog is in a variety of languages – you should be able to change it either in-game or via the config file:
~/Library/Application Support/dhewm3/base/folder (Command+Gin Finder)DoomConfig.cfgfrom hereseta sys_lang "english"So cool. All working. Thank you
hmm i don’t get my custom resolution to work…
shouldn’t it be:
seta r_mode “1” // Enable a custom resolution (width + height)
not -1 ?
@Oliver it is
-1forr_mode, mentioned in many online guides. Maybe you can try to use it unquoted, or double-check ifr_aspectRatiofits your screen as well?THANK YOU! Worked