Suica is an ideal travel companion in Japan, as it’s widely used to pay cashless: public transport, vending machines, and even ramen restaurants all over the county. In the Kyoto and Osaka region it is fully compatible with the IC electronic payment solution.
There is a physical Suica card to obtain, but modern travelers may prefer to have a virtual Suica card in the Wallet.
Good thing: there’s an easy (and native language) setup of a Suica card possible directly using the Wallet app!
This is particularly practical, as the official Suica App is unfortunately only in Japanese 🇯🇵 (as of the time writing). In the second section below, the setup steps and data inputs are described in English to help Japan travelers to get a virtual «Suica» card using the App nonetheless.
A) Easy option: Suica virtual card using the iOS Wallet App
💡 Note: NO prior App installation of Suica for iOS is required here!
- Open the «Wallet» App in iOS

- Click on «+add», and select „Travel Card“
- Choose the „Suica“-service and continue with the on-screen instructions to get a virtual Suica card.
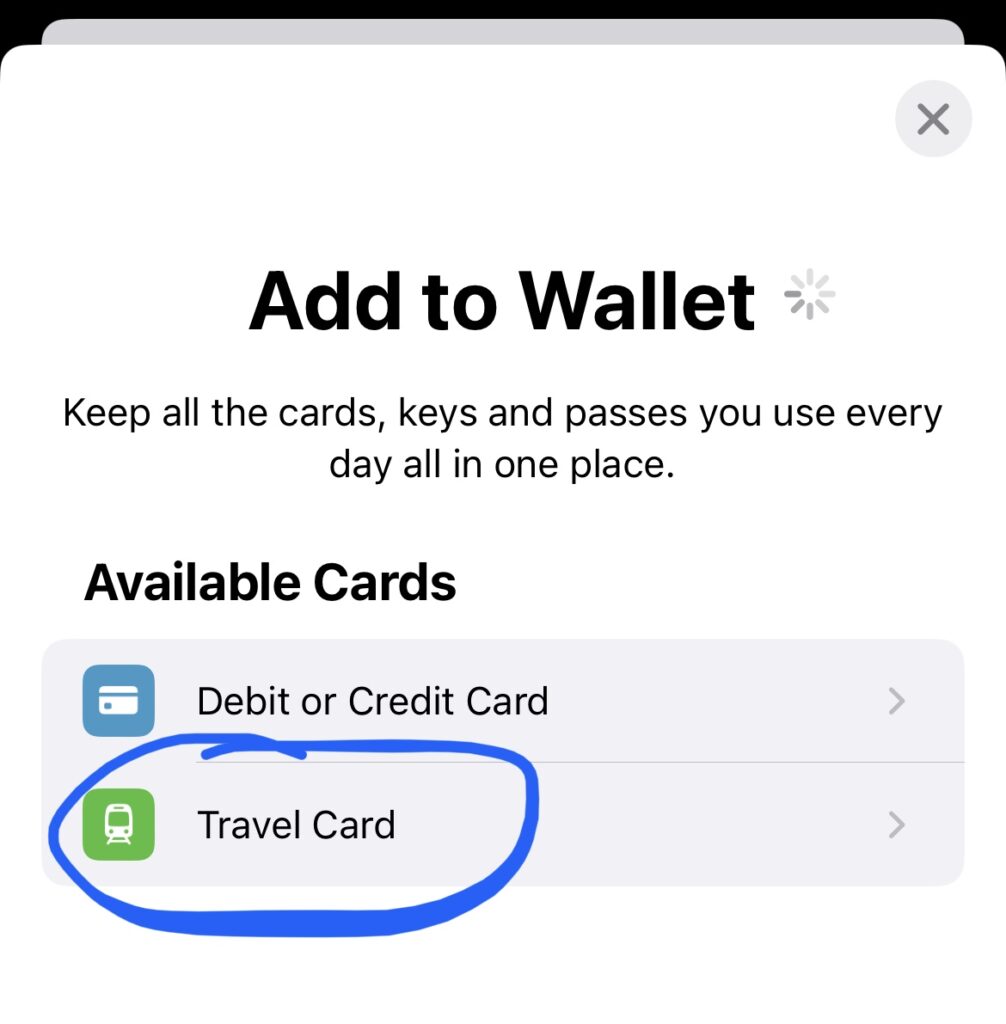
Now make sure that the Suica card is added as «Express Travel Card» for the Wallet, as described further below.
B) Suica virtual card setup using the official iOS App
💡 Hint: Make sure you have a stable internet connection to complete the whole setup.
Suica App setup on Apple iOS
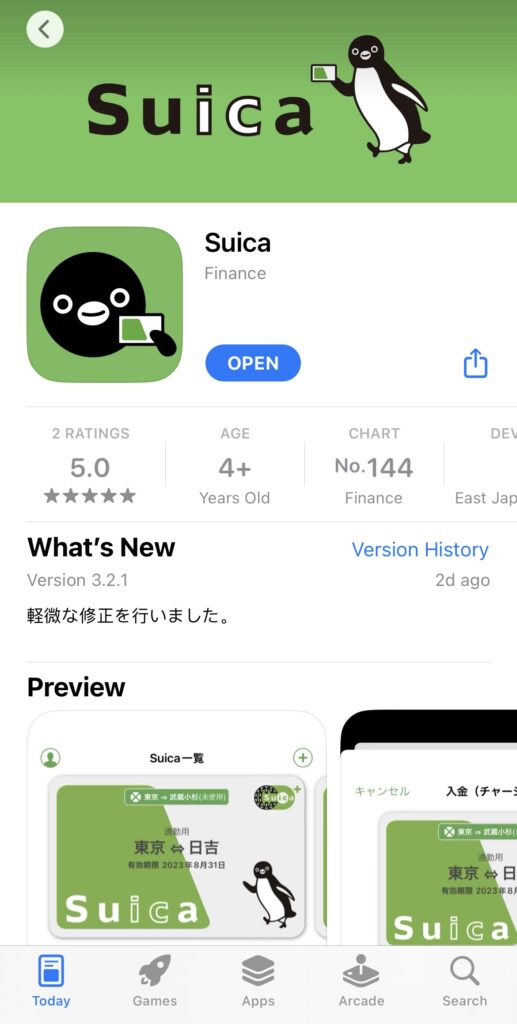
First download and install the app from the Apple App Store:
Once installed, launch the app and start with adding a new Suica account.
Adding a free «Suica Member» account
This is no different to other services: register a new account to a working email address (a confirmation code will be sent).
Click on «Member Registration» (bottom last button) to get started:
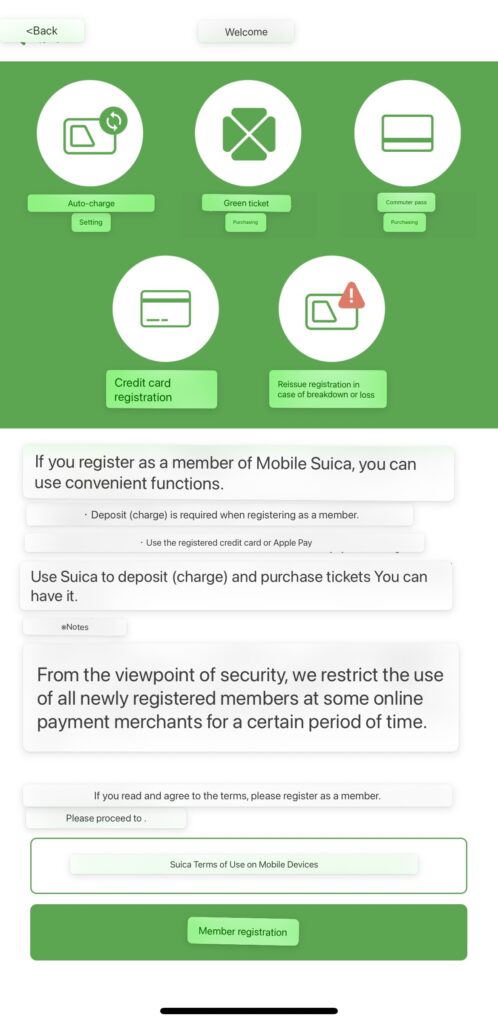
- Email address, (works with «Hide my»)
- and any password you prefer
Obtain the authorization code from the email sent within 30 minutes & confirm the new account!

Creating a new «Suica» Virtual Card using the App
💡 Good to know: within the App‘s interface, usually the ↗️top right action = „✅OK (next)“, and ↖️top left action = „❌Cancel (back)“.
Continue with adding a new Suica virtual card by clicking on the App‘s dashboard screen on the large „+ Add“-icon (after log-in) or „Issuance of Suica“.
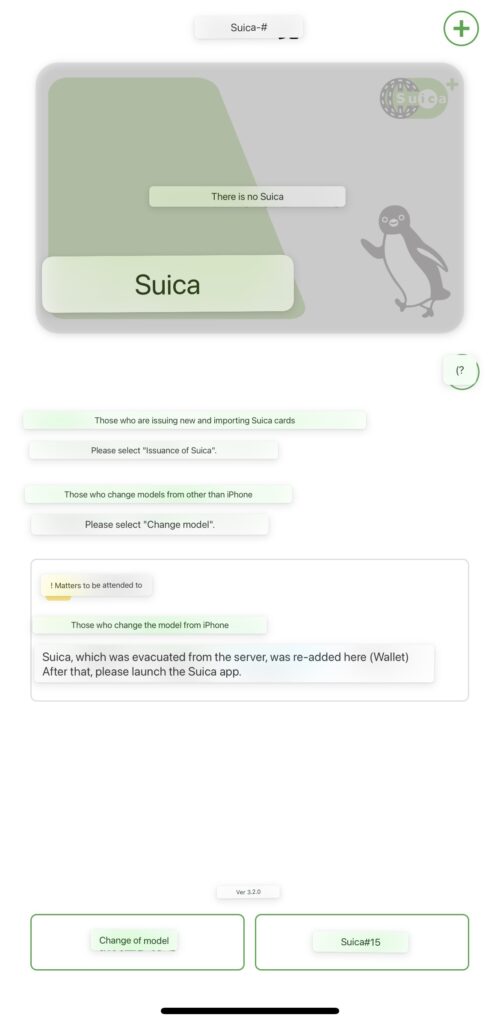
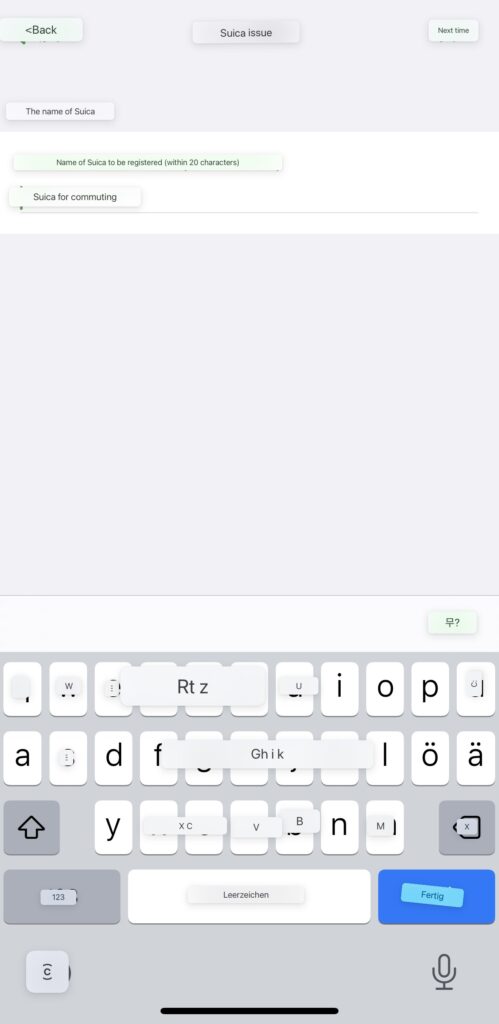
First the new card needs a display name, e.g. something like „Travel“, „Personal“, or alike – this is simply to distinguish multiple Suica cards.
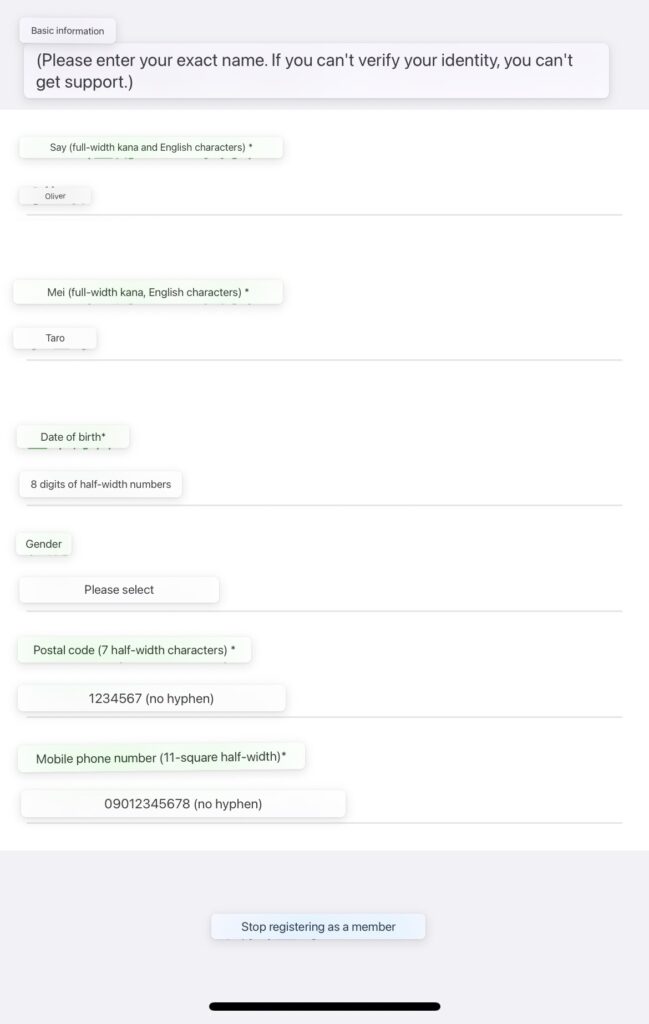
Now the card needs to be associated to the owner by completing additional basic information in the following order:
- First name («Say»)
- Last name («Mei»)
- Date of birth: 8-digits as YearMMDD (e.g. 19950723)
- Gender: 1st entry is „female“, 2nd is „male“
- Postal code/ P.O.: 7-digits (use 000 zeroes to fill-up to required length)
- Mobile phone number: 11-digits, start with 0 for county prefix (e.g.: 0041…)
Confirm the data input using the ↗️top right text-button – if something was entered incorrectly, it will be highlighted with a red notice.
If all is correct, a first 💴 Yen top-up charge will be required as final activation step for the new Suica card.
Activating the «Suica» virtual card by adding Yen
Conduct a top-up of any desired amount in Yens. Easiest is to add money using Apple Pay, also for future top-ups when the Suica credit is running out.
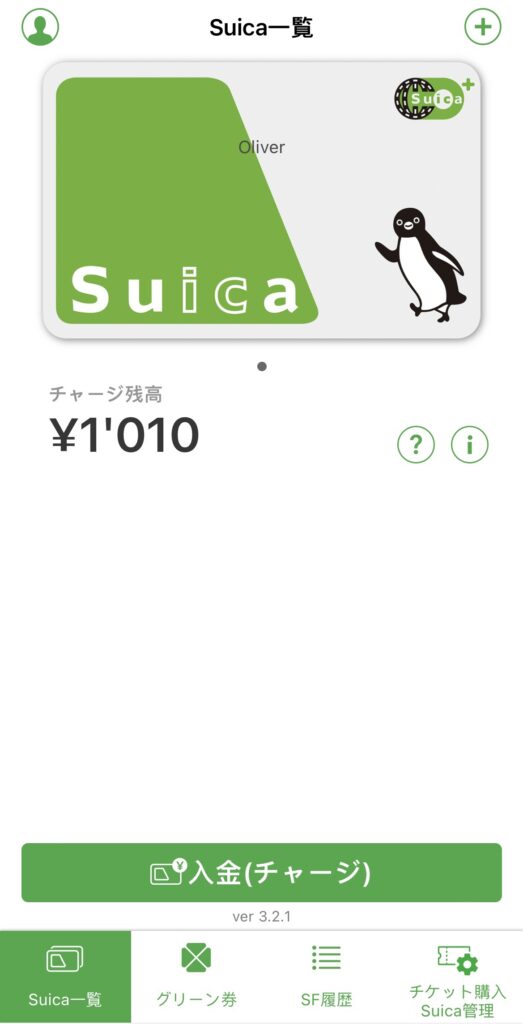
Use the Suica card with the iOS Wallet & Express Travel Card
Once the Suica card is activated, it can be added to the Apple Wallet:
- Open the «Wallet» App in iOS
- Click on «+add», and select „Travel Card“
- Choose the „Suica“-service and the virtual card from its app should automatically be added!


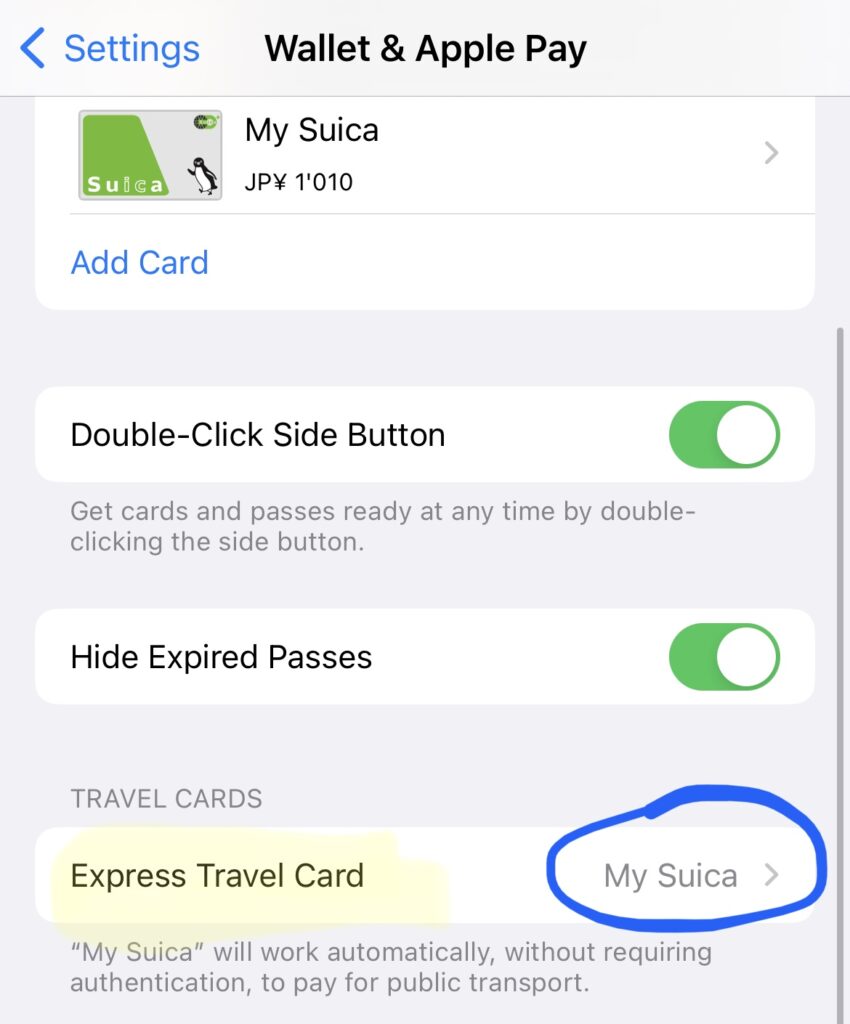
Suica as preferred Express Travel Card
This might have configure Suica automatically as preferred Express Travel Card. However, this can also be done / verified through the iOS System Settings app » under «Wallet & Apple Pay».
Thats‘s it!
It’s not so difficult getting a virtual Suica card after all. Happy traveling in Japan! 🙏😎


1 thought on “Add Japan‘s «Suica» public transport card to iOS Wallet (English how-to)”